
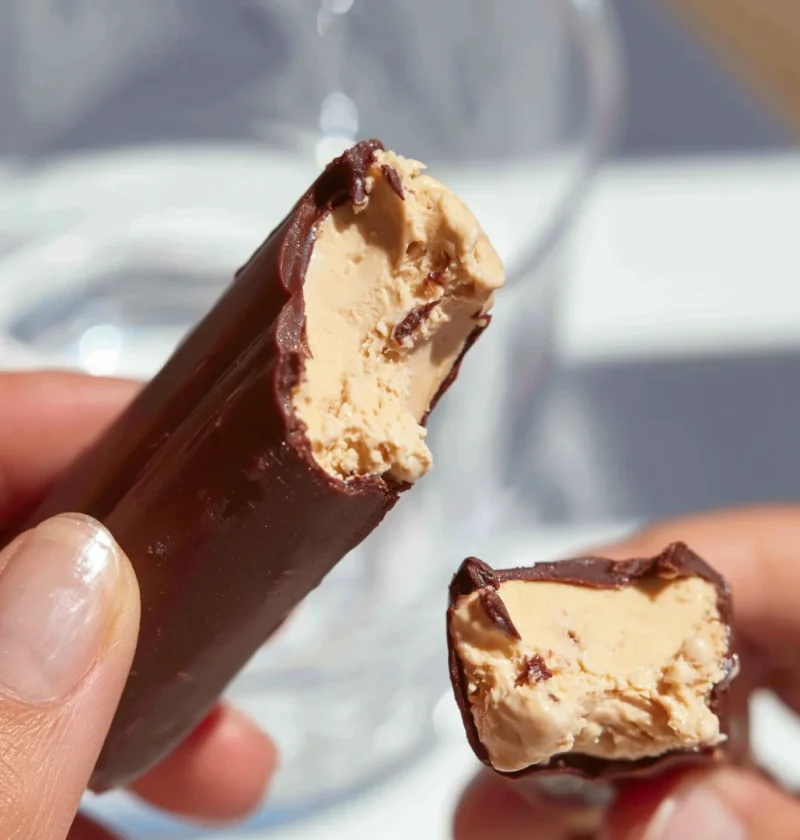
Summer is the perfect time to indulge in a refreshing treat, and what could be better than homemade Chocolate Coated Peanut Butter Ice Cream Pops? This delightful dessert combines the rich, creamy goodness of peanut butter ice cream with a luxurious chocolate coating, creating a perfect balance of sweet and salty flavors. These pops are not only easy to make but also serve as a fantastic way to cool down on hot sunny days. Imagine biting into a smooth, creamy center that gives way to a crunchy chocolate shell, providing an irresistible texture contrast with each bite. With just a few simple ingredients and no-churn methods, these ice cream pops are sure to become a favorite summer go-to for both kids and adults alike! Whether you’re hosting a barbecue or simply treating yourself after a long day, these Chocolate Coated Peanut Butter Ice Cream Pops will be a hit!
Ingredients
- For the Peanut Butter Ice Cream:
- 1 cup creamy peanut butter – Look for a brand that uses minimal additives for the best flavor, preferably one made from just peanuts and salt for a pure taste.
- 2 cups heavy whipping cream – Ensure it’s cold for the best whipping results; cold cream whips up fluffier and helps incorporate air for a lighter texture.
- 1 cup sweetened condensed milk – This adds a rich sweetness that balances the peanut butter; its thickness also contributes to a creamy texture.
- 1 teaspoon vanilla extract – Pure vanilla extract is recommended for a more robust flavor, enhancing the overall taste without artificial notes.
- For the Chocolate Coating:
- 1 ½ cups semi-sweet chocolate chips – Choose high-quality chips for a smoother melt; brands like Ghirardelli or Guittard work particularly well.
- 1 tablespoon coconut oil (or vegetable oil) – This helps the chocolate coating to remain glossy and prevents it from cracking, ensuring a beautiful finish.
- Optional Toppings:
- Chopped peanuts – Adds an extra crunch and complements the peanut butter flavor, providing a delightful texture contrast.
- Sea salt – A sprinkle enhances the sweet and salty flavor profile, making each bite even more satisfying and complex.
Note: For a healthier alternative, you can use natural peanut butter and dark chocolate chips, which can provide a richer taste while reducing sugar content. You can learn more about this topic to explore different variations and healthier options for these delectable treats.
Steps / Instructions
- Prepare the Ice Cream Mixture: In a large mixing bowl, combine 1 cup of creamy peanut butter and 1 cup of sweetened condensed milk. Mix until smooth and creamy, ensuring there are no lumps of peanut butter remaining; a hand mixer can help achieve a uniform texture.
- Add the Cream: In another bowl, whip 2 cups of heavy whipping cream until stiff peaks form. This typically takes about 3-5 minutes with a hand mixer. Gently fold the whipped cream into the peanut butter mixture until fully combined, making sure to maintain the lightness of the whipped cream. Be careful not to deflate the whipped cream; use a spatula to fold gently, and ensure the mixture is well-combined but still airy.
- Flavoring: Stir in 1 teaspoon of vanilla extract to enhance the flavor of your ice cream mixture, blending it in thoroughly to ensure even distribution; this step is vital for a well-rounded taste.
- Freeze the Mixture: Pour the peanut butter ice cream mixture into popsicle molds, filling them to about ¾ full to allow for expansion. Insert sticks and freeze for at least 4-6 hours, or until solid. For best results, leave them overnight if you can; this ensures they are thoroughly set and easier to remove from the molds.
- Prepare the Chocolate Coating: Once the ice cream pops are completely frozen, melt 1 ½ cups of semi-sweet chocolate chips in a microwave-safe bowl with 1 tablespoon of coconut oil. Heat in 30-second intervals, stirring in between until smooth and fully melted, taking care not to overheat, as this can cause the chocolate to seize or burn.
- Coat the Pops: Carefully remove the ice cream pops from the molds. Dip each pop in the melted chocolate, allowing excess chocolate to drip off before placing them back onto a parchment-lined baking sheet. If desired, sprinkle with chopped peanuts or a pinch of sea salt before the chocolate sets to enhance both flavor and appearance, creating a gourmet finish.
- Freeze Again: Place the chocolate-coated pops back on a parchment-lined baking sheet and freeze for an additional 30 minutes to allow the chocolate to harden completely, ensuring a perfect bite every time. This final freeze is crucial for setting the chocolate coating.
Tips & Tricks
- To avoid sticking, run warm water over the outside of the molds before removing the pops. This will help them release without breaking and makes the process much smoother.
- Make these ahead of time and keep them in the freezer for quick and easy treats on hot days. They can be stored in an airtight container for up to two weeks; just layer them with parchment paper to prevent sticking.
- Common mistakes to avoid include overmixing the whipped cream, which can create a dense texture instead of a light and fluffy ice cream. Always fold gently and stop mixing as soon as combined to achieve the desired consistency.
- Consider using a double boiler to melt the chocolate if you prefer more control over the melting process, as it prevents direct heat from causing the chocolate to seize or burn, leading to a smoother coating.
Variations
- Try adding different nut butters like almond or cashew for a unique flavor twist that still complements the chocolate coating, providing a new dimension to your pops.
- For a fruity variation, mix in crushed strawberries or bananas into the ice cream base for a delightful contrast to the peanut butter, creating a refreshing treat that balances the richness.
- Experiment with different chocolate types for the coating, such as white chocolate or dark chocolate, for varied flavors that can cater to different palates, ensuring there’s a version for everyone to enjoy.
Serving Suggestions
Serve these pops as a fun dessert at summer parties or family gatherings. Pair them with fresh fruit like berries or a scoop of vanilla ice cream for an extra indulgence. They make for the perfect sweet addition to any barbecue or picnic! For an elevated presentation, consider serving them on a tiered dessert stand, which adds a touch of elegance to your dessert table. Check out our related guide for more tips on serving and enjoying these delightful treats, ensuring your guests are impressed with both the taste and presentation.
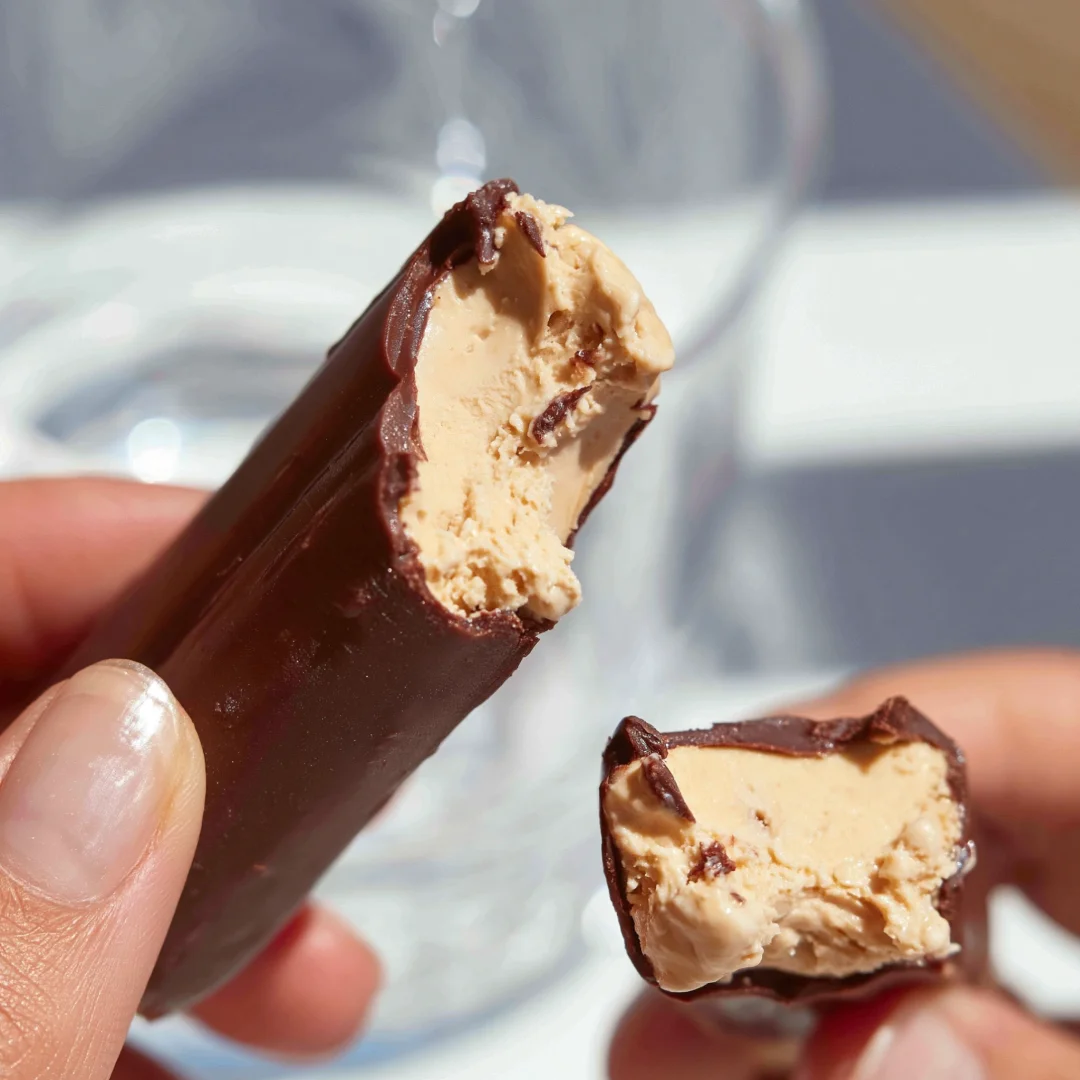
Chocolate Coated Peanut Butter Ice Cream Pops
Homemade Chocolate Coated Peanut Butter Ice Cream Pops combine the rich, creamy goodness of peanut butter ice cream with a luxurious chocolate coating, creating a perfect balance of sweet and salty flavors. These pops are easy to make and great for cooling down on hot sunny days.
Ingredients
- 1 cup creamy peanut butter
- 2 cups heavy whipping cream
- 1 cup sweetened condensed milk
- 1 teaspoon vanilla extract
- 1 ½ cups semi-sweet chocolate chips
- 1 tablespoon coconut oil
- Chopped peanuts (optional)
- Sea salt (optional)
Directions
In a large mixing bowl, combine 1 cup of creamy peanut butter and 1 cup of sweetened condensed milk. Mix until smooth and creamy.
In another bowl, whip 2 cups of heavy whipping cream until stiff peaks form. Gently fold the whipped cream into the peanut butter mixture.
Stir in 1 teaspoon of vanilla extract to enhance the flavor of your ice cream mixture.
Pour the peanut butter ice cream mixture into popsicle molds, filling them to about ¾ full. Insert sticks and freeze for 4-6 hours, or until solid.
Melt 1 ½ cups of semi-sweet chocolate chips in a microwave-safe bowl with 1 tablespoon of coconut oil until smooth.
Carefully remove the ice cream pops from the molds. Dip each pop in the melted chocolate and allow excess chocolate to drip off.
Place the chocolate-coated pops back on a parchment-lined baking sheet and freeze for an additional 30 minutes.
Nutrition Facts
Recipe Reviews
- ★★★★★
Excellent recipe!
Leave a Reply
Your email address will not be published. Required fields are marked *




Excellent recipe!