
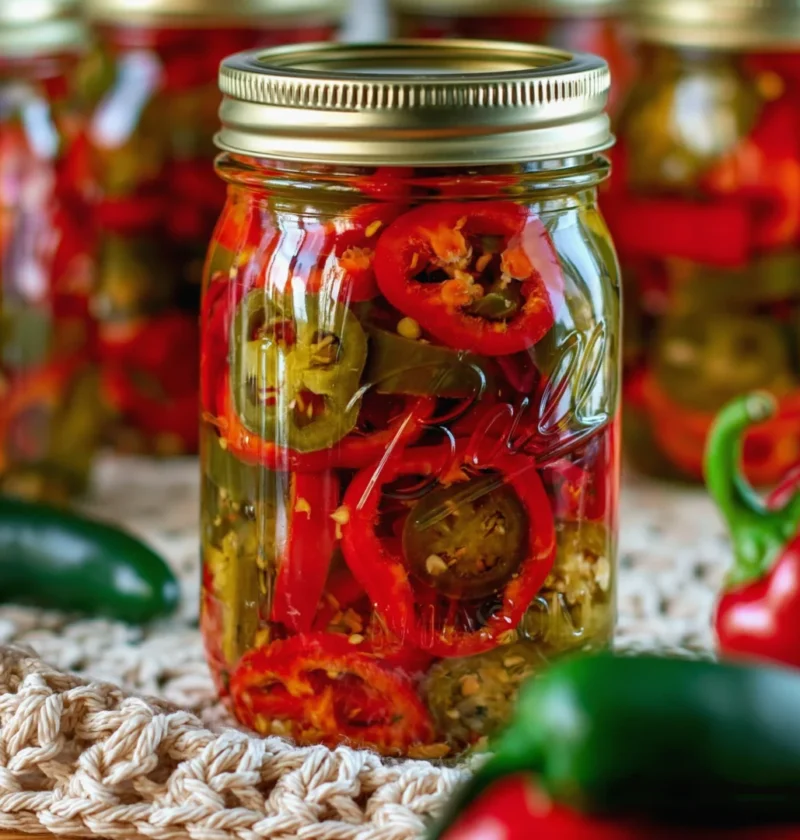
Pickled peppers offer a vibrant, tangy addition to a variety of dishes, elevating their flavors and providing a delightful crunch. These preserved gems can be both sweet and spicy, catering to different palates and culinary uses. Historically, pickling has been a method for food preservation across cultures, extending the life of seasonal ingredients like peppers. The art of pickling not only preserves flavors but also enhances them, creating complex, multi-dimensional tastes. Whether you’re looking to spice up a sandwich or create a unique appetizer, understanding how to pickle peppers opens a world of possibilities. Dive into this comprehensive guide on making your own pickled peppers at home, featuring both sweet and hot varieties that can cater to any meal or occasion.
Ingredients
- For Hot Pickled Peppers:
- 1 pound jalapeño or banana peppers, sliced into rings for easy packing and even brining
- 2 cups distilled white vinegar, which provides a sharp, clean flavor
- 1 cup water, helping to balance the acidity of the vinegar
- 1 tablespoon pickling salt, essential for flavor and preservation
- 2 tablespoons sugar (optional for balance), which helps to counteract the heat if using spicy varieties
- 2 cloves garlic, peeled and smashed to release their aromatic oils
- 1 teaspoon black peppercorns, adding a subtle spice
- 1 teaspoon mustard seeds, contributing a mild tang
- 1 teaspoon dried oregano, which complements the peppers beautifully
- For Sweet Pickled Peppers:
- 1 pound sweet bell peppers, sliced into strips or rings for a colorful presentation
- 1 cup apple cider vinegar, providing a fruity acidity
- 1 cup water, balancing the overall flavor profile
- 1 tablespoon kosher salt, crucial for seasoning
- 1 cup sugar, which gives the sweetness that defines sweet pickled peppers
- 1 teaspoon crushed red pepper flakes (optional), adding a hint of heat for those who enjoy a kick
- 2 cloves garlic, peeled and smashed, enriching the sweetness with their robust flavor
- 1 teaspoon coriander seeds, imparting a warm, citrusy note
- 1 teaspoon allspice berries, which add a unique depth of flavor
Use fresh, high-quality peppers for the best results, as they contribute to both the flavor and the visual appeal. Feel free to substitute different pepper varieties depending on your spice tolerance and flavor preferences; for instance, try using serrano peppers for more heat or sweet mini peppers for a milder taste. You can learn more about this topic and its fascinating history in various cuisines.
Steps / Instructions
- Prepare the Jars: Start by sterilizing your canning jars and lids. Place them in a boiling water bath for 10 minutes and let them air dry completely to avoid any contamination.
- Make the Brine: In a medium saucepan, combine the vinegar, water, salt, and sugar (if using). Bring the mixture to a boil over medium heat, stirring until the salt and sugar are fully dissolved. This brine acts as a flavorful base that not only preserves but also infuses the peppers.
- Add Spices: Add the smashed garlic, black peppercorns, mustard seeds, and herbs to the boiling brine. Allow it to simmer for an additional 5 minutes, letting the flavors meld together and create a fragrant mixture that will transform your pickled peppers.
- Pack the Peppers: While the brine simmers, pack your sliced peppers tightly into the sterilized jars. Leave about half an inch of headspace at the top of each jar to allow for expansion and air circulation.
- Pour the Brine: Carefully pour the hot brine over the peppers in each jar, ensuring the peppers are completely submerged to prevent spoilage. Use a clean knife or chopstick to remove any air bubbles and add more brine if needed, ensuring a tight seal with the liquid.
- Seal the Jars: Wipe the rims of the jars with a clean cloth to remove any residue, which can interfere with the sealing process. Then place the sterilized lids on top. Screw the metal bands on until they are fingertip-tight, ensuring they are secure but not overly tight.
- Process the Jars: Process the jars in a boiling water bath for 10-15 minutes to ensure the jars are sealed properly. The time may vary slightly based on your altitude, so adjust accordingly for optimal preservation.
- Cool and Store: Remove the jars from the water bath and let them cool on a clean dish towel. Once cool, check that the lids have sealed by pressing down in the center; if it pops back, it’s not sealed properly. Store sealed jars in a cool, dark place for at least two weeks before consuming for best flavor, allowing time for the pickling process to fully develop.
Tips & Tricks
- Storage: Once opened, store pickled peppers in the refrigerator. They should last for several weeks, maintaining their flavor and crunch.
- Flavor Development: For the best flavor, allow the pickled peppers to sit for at least two weeks; this gives time for the flavors to develop fully, making each bite more delicious.
- Common Mistakes: Avoid using iodized salt in your brine, as it can cause discoloration and cloudiness in the final product. Stick with pickling salt or kosher salt for clear, vibrant results.
- Customization: Feel free to experiment with different spices and herbs based on your personal taste preferences. Adding extra garlic, various types of peppercorns, or even fresh herbs can create unique flavor profiles.
Variations
To enjoy a Mediterranean twist, consider adding olives or sun-dried tomatoes to your pickled pepper mix, which can create a delightful combination of flavors. You can also incorporate herbs like thyme or dill for added flavor depth. If you’re looking for a fiery kick, incorporate fermented hot peppers into the brine for a tangy, spicy condiment. Check out our related guide for more tips that may inspire your next pickling adventure.
Serving Suggestions
Pickled peppers can enhance a variety of dishes, making them versatile additions to your meals. Serve them as part of a charcuterie board, adding color and zest, or as a zesty topping for tacos or nachos. They also make excellent additions to salads, providing a crunchy texture and vibrant flavor that can elevate any dish.
FAQ
Can I use frozen peppers for pickling? While fresh peppers yield the best results in terms of flavor and texture, you can use frozen peppers in a pinch. However, the texture may differ after pickling, often becoming softer.
How long will my pickled peppers last? When stored properly in a cool, dark place, pickled peppers can last up to a year, but their best flavor is within the first six months after pickling.
Can I pickle other vegetables with the same brine? Yes! Many vegetables, such as carrots, cucumbers, and onions, can be pickled using the same brine recipe, allowing for a variety of pickled treats.
Conclusion
Pickling peppers is a simple and rewarding way to preserve the vibrant flavors of your garden or farmer’s market finds. With these easy steps and tips, you can create your own delicious sweet and hot pickled peppers at home. Enjoy them in salads, sandwiches, or as a stand-alone snack, knowing you have crafted a flavorful addition to your culinary repertoire!
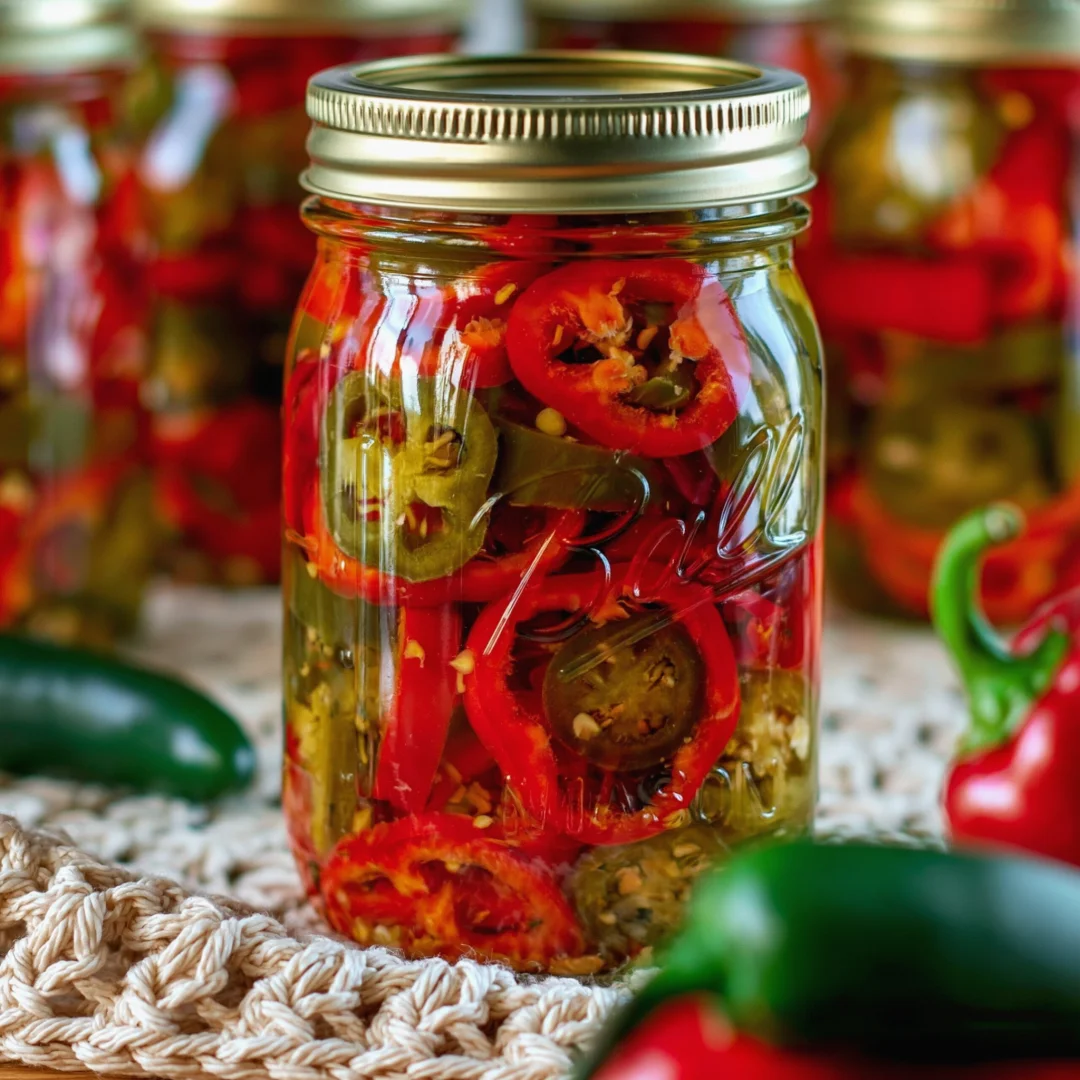
Pickled Peppers, Hot or Sweet
Pickled peppers offer a vibrant, tangy addition to a variety of dishes, elevating their flavors and providing a delightful crunch. These preserved gems can be both sweet and spicy, catering to different palates and culinary uses.
Ingredients
- For Hot Pickled Peppers:
- 1 pound jalapeño or banana peppers, sliced into rings for easy packing and even brining
- 2 cups distilled white vinegar, which provides a sharp, clean flavor
- 1 cup water, helping to balance the acidity of the vinegar
- 1 tablespoon pickling salt, essential for flavor and preservation
- 2 tablespoons sugar (optional for balance), which helps to counteract the heat if using spicy varieties
- 2 cloves garlic, peeled and smashed to release their aromatic oils
- 1 teaspoon black peppercorns, adding a subtle spice
- 1 teaspoon mustard seeds, contributing a mild tang
- 1 teaspoon dried oregano, which complements the peppers beautifully
- For Sweet Pickled Peppers:
- 1 pound sweet bell peppers, sliced into strips or rings for a colorful presentation
- 1 cup apple cider vinegar, providing a fruity acidity
- 1 cup water, balancing the overall flavor profile
- 1 tablespoon kosher salt, crucial for seasoning
- 1 cup sugar, which gives the sweetness that defines sweet pickled peppers
- 1 teaspoon crushed red pepper flakes (optional), adding a hint of heat for those who enjoy a kick
- 2 cloves garlic, peeled and smashed, enriching the sweetness with their robust flavor
- 1 teaspoon coriander seeds, imparting a warm, citrusy note
- 1 teaspoon allspice berries, which add a unique depth of flavor
Directions
Prepare the Jars: Start by sterilizing your canning jars and lids. Place them in a boiling water bath for 10 minutes and let them air dry completely to avoid any contamination.
Make the Brine: In a medium saucepan, combine the vinegar, water, salt, and sugar (if using). Bring the mixture to a boil over medium heat, stirring until the salt and sugar are fully dissolved.
Add Spices: Add the smashed garlic, black peppercorns, mustard seeds, and herbs to the boiling brine. Allow it to simmer for an additional 5 minutes.
Pack the Peppers: While the brine simmers, pack your sliced peppers tightly into the sterilized jars. Leave about half an inch of headspace at the top of each jar.
Pour the Brine: Carefully pour the hot brine over the peppers in each jar, ensuring the peppers are completely submerged.
Seal the Jars: Wipe the rims of the jars with a clean cloth. Place the sterilized lids on top and screw the metal bands on until they are fingertip-tight.
Process the Jars: Process the jars in a boiling water bath for 10-15 minutes.
Cool and Store: Remove the jars from the water bath and let them cool on a clean dish towel. Store sealed jars in a cool, dark place for at least two weeks before consuming.
Recipe Reviews
- ★★★★★
Excellent recipe!
Leave a Reply
Your email address will not be published. Required fields are marked *


Excellent recipe!