Table of Contents
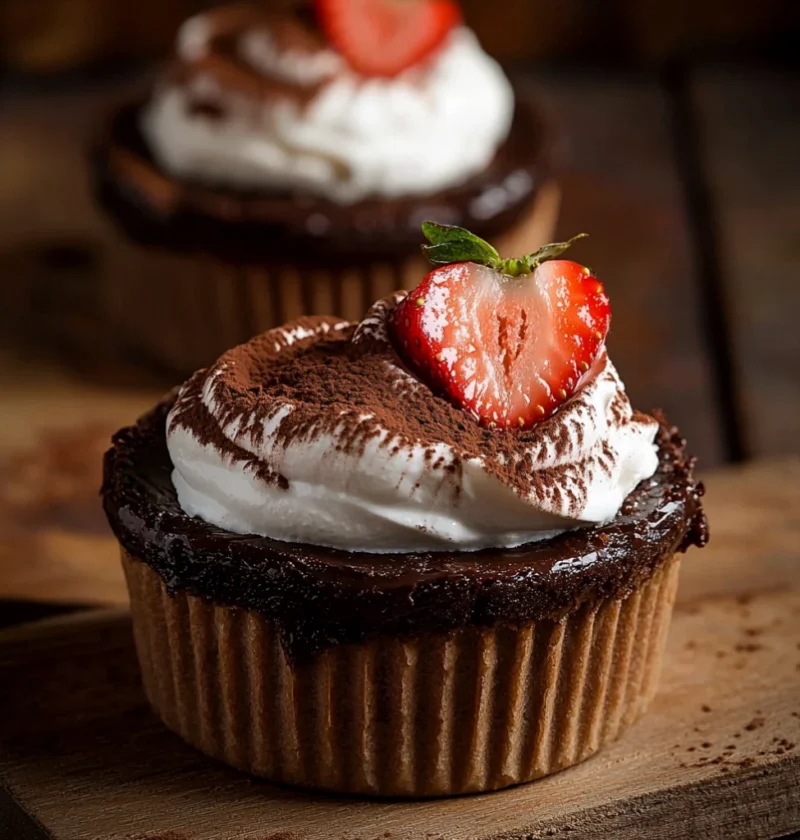
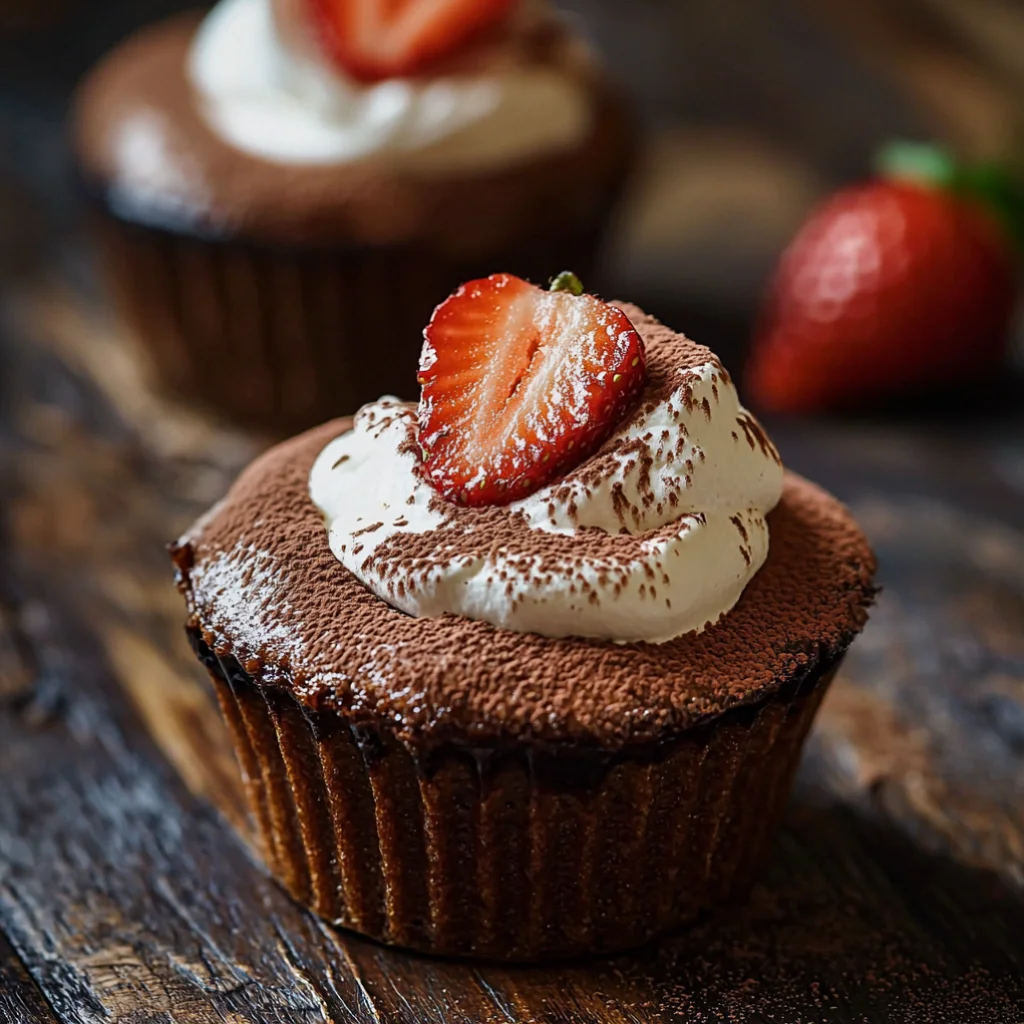
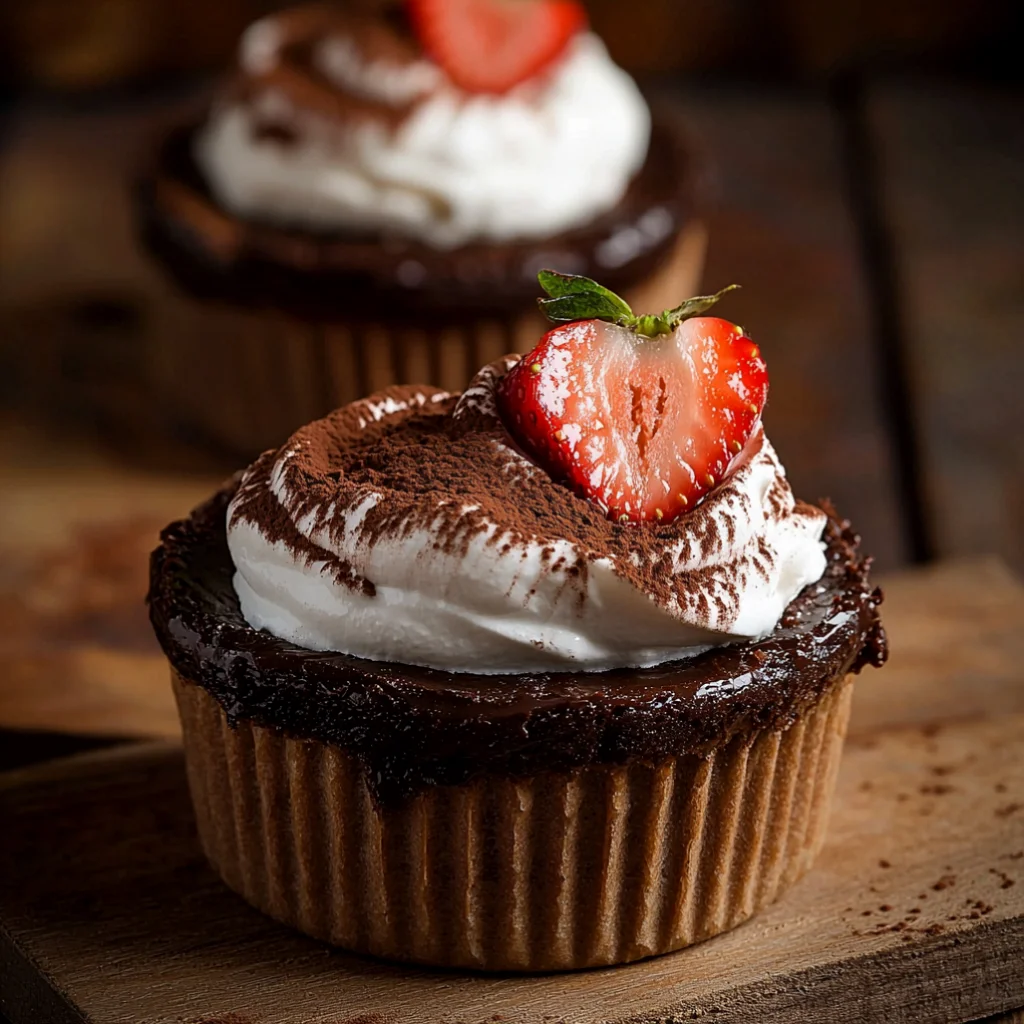
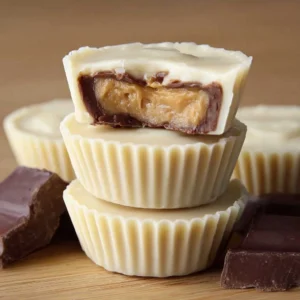
If you’re looking for a dessert that embodies elegance and indulgence, look no further than Chocolate Mousse Cups. This delightful treat is a staple in the world of desserts, offering a rich and silky experience that melts in your mouth. Originating from France, chocolate mousse has captivated dessert lovers for centuries, celebrated not only for its luxurious flavor but also for its versatility. Traditionally served in elegant surroundings, this dish has found its way into homes and restaurants alike, creating memorable moments around the dinner table. Perfect for special occasions or an intimate dinner, these mousse cups provide an easy yet impressive way to satisfy your chocolate cravings. Whether you’re a novice in the kitchen or an experienced baker, this chocolate mousse recipe will ensure success every time! The combination of whipped cream and dark chocolate creates a dessert that is both simple to prepare and visually stunning, making it a favorite for entertaining guests. With its rich history and the ability to evoke a sense of sophistication, these Chocolate Mousse Cups are truly a timeless dessert. Each spoonful is a delightful balance of airy texture and deep, luscious chocolate flavor, sure to please anyone who has the pleasure of indulging in them.
Ingredients
For the Chocolate Mousse
- 8 oz (225 g) dark chocolate (at least 70% cocoa), finely chopped – For the best results, choose high-quality chocolate with a rich flavor profile; the cocoa percentage can significantly affect the sweetness and bitterness of the mousse. Look for brands that use ethically sourced cocoa to enhance the overall quality of your dessert, as this can also contribute to better sustainability practices in chocolate production.
- 2 cups (480 ml) heavy whipping cream, chilled – Make sure the cream is well-chilled as this helps in achieving the perfect whip and stability. You can also use heavy cream for a similar effect, but whipping cream usually has the ideal fat content for this recipe. The colder the cream, the faster it will whip, so consider keeping it in the fridge until you’re ready to use it.
- 1/4 cup (50 g) granulated sugar – Adjust the amount based on your sweetness preference; you can also experiment with powdered sugar for a different texture. Remember that the type of chocolate used also influences the overall sweetness, so taste as you go! For those watching their sugar intake, natural sweeteners like agave syrup could also be used, but adjustments to the wet ingredients may be necessary.
- 1 teaspoon vanilla extract – Opt for pure vanilla extract for a more pronounced flavor; avoid imitation vanilla if possible. The quality of vanilla can elevate the dessert, providing a wonderful aromatic flavor that complements the chocolate beautifully.
- Pinch of salt – A small amount enhances the overall flavor of the chocolate, making it more pronounced. Salt is essential in desserts as it balances sweetness and accentuates the chocolate taste, creating a more rounded flavor profile.
Toppings (Optional)
- Whipped cream for garnish – Whip some extra cream for a fluffy topping that complements the mousse. Using a touch of powdered sugar in the whipped cream can add a hint of sweetness, making each bite even more delightful.
- Chocolate shavings or curls – Use a vegetable peeler on a chocolate bar to create beautiful curls for decoration. You can also experiment with white chocolate for a striking contrast against dark chocolate mousse, providing a visual and flavor contrast that elevates the dessert.
- Fresh fruit (such as raspberries or strawberries) – Berries add a refreshing contrast to the rich chocolate flavor, lending both visual appeal and a burst of tartness that cuts through the richness. This not only enhances the flavor but also adds a pop of color to your presentation.
- Mint leaves for decoration – A sprig of mint can add color and a hint of freshness to your presentation. It also offers a slight herbal note that can complement the chocolate beautifully, creating a harmonious balance of flavors.
When selecting chocolate, opt for high-quality dark chocolate for the best flavor. The higher the cocoa content, the richer the mousse will be, and keep in mind that chocolate labeled as “bittersweet” or “semisweet” can also work well. You can also experiment with different cocoa powder and blends to create various depths of taste in your chocolate mousse. For an egg-free chocolate mousse, this recipe is perfect as it doesn’t require any eggs while still achieving a light, fluffy texture. You can learn more about this topic, including its history and variations that can enhance your culinary repertoire, further expanding your knowledge about this exquisite dessert.
Steps / Instructions
- Prepare the Chocolate: In a heatproof bowl, melt the chopped dark chocolate over a pot of simmering water (double boiler method). Stir occasionally until smooth and glossy. Be careful not to allow any water to get into the chocolate, as this can cause it to seize. Remove from heat and let it cool slightly, about 5-10 minutes, so it doesn’t melt the whipped cream when combined. Cooling the chocolate is crucial; if it’s too hot, it will affect the whipped cream’s ability to maintain its structure. Ensure that the chocolate is warm, not hot, to keep the integrity of the mousse intact.
- Whip the Cream: In a separate large bowl, pour in the chilled heavy whipping cream. Using an electric mixer, beat on medium speed until soft peaks form, which should take about 2-3 minutes. Gradually add granulated sugar, vanilla extract, and a pinch of salt while continuing to beat. Stop when stiff peaks form; this means the cream will hold its shape and provide the desired texture when folded with the chocolate. The whipped cream’s volume will increase significantly, creating an airy base for your mousse. Make sure to not over-whip the cream, as this can lead to a grainy texture.
- Combine Chocolate and Cream: Once the melted chocolate has cooled (but is still pourable), gently fold it into the whipped cream. Use a spatula to incorporate until no streaks remain, being cautious not to deflate the mixture, as you want to retain that airy texture. This is the critical step where the lightness of the mousse is achieved – take your time and fold gently. Aim for a uniform mixture without over-mixing, which can lead to a dense mousse. The folding technique is essential; think of it as a gentle embrace rather than a vigorous stir.
- Chill the Mousse: Spoon the mousse into individual dessert cups or bowls. Cover with plastic wrap and refrigerate for at least 2 hours, allowing the flavors to meld and the mousse to set. This chilling time is essential; it allows the mousse to thicken and firm up, providing that perfect spoonable texture. If possible, let them chill overnight for an even better flavor development. The longer it sits, the richer the taste becomes as the flavors integrate.
- Serve: Once set, top each mousse cup with a dollop of whipped cream, chocolate shavings, and fresh fruit as desired. Serve chilled for the best experience! For an added touch, you can also drizzle some chocolate sauce over the top before serving. Presenting the mousse in clear cups or elegant glassware showcases the beautiful layers, enhancing the visual appeal. Consider using a piping bag for the whipped cream to create a more sophisticated presentation.
Tips & Tricks
To ensure your chocolate mousse is light and fluffy, avoid overmixing when folding the chocolate into the whipped cream. This technique will help maintain the mousse’s airy consistency, which is key to its delightful texture. If you need to make the dessert ahead of time, it can be stored in the refrigerator for up to 3 days, covered well to prevent it from absorbing any odors from the fridge. Check out our related guide for more tips on perfecting your mousse-making skills, including temperature tips and ingredient selections that can elevate your dish even further.
For an even more decadent experience, consider serving these Chocolate Mousse Cups with a drizzle of chocolate sauce or a raspberry coulis to enhance the flavors further. Common mistakes to avoid include using warm chocolate, which can cause the cream to deflate, and not allowing adequate chilling time; these can significantly affect the texture and enjoyment of your mousse. Remember, patience is key! If the mousse doesn’t set properly, it may need additional chilling time, so don’t hesitate to allow it to rest longer if needed! Always taste your mixture before serving; a dash more vanilla or a pinch more salt can make all the difference in achieving the perfect flavor profile, ensuring every bite is a delightful experience.
Variations and Substitutions
You can make the mousse with milk chocolate, dark chocolate, or even white chocolate for different flavor profiles. Some versions use a custard-style base with egg yolks and cornstarch for extra richness.
If you want a shortcut, serve the mousse in simple dessert glasses instead of making edible chocolate cups. You can also layer it with fruit compote, crushed cookies, or cake pieces for a parfait-style dessert.
Serving Suggestions
Serve Chocolate Mousse Cups chilled for the best texture. They work well as an elegant ending to a dinner or as a small dessert for special occasions.
For a beautiful finish, top with whipped cream, raspberries, strawberries, blueberries, or chocolate shavings. If you want more contrast, add a crisp cookie or biscuit on the side.
FAQs
Can I make them ahead of time?
Yes, they’re a great make-ahead dessert because the mousse needs time to chill and set.
Can I use store-bought cups?
Yes, you can use glass dessert cups, small bowls, or store-bought chocolate cups for an easier version.
What chocolate works best?
Semi-sweet or dark chocolate is the most common choice, but milk chocolate and white chocolate also work.
Final Thoughts
Chocolate Mousse Cups are a small dessert with a big payoff: creamy texture, deep chocolate flavor, and a pretty presentation. They’re easy enough for home bakers but elegant enough for entertaining.
Pro Tips
- Cool the melted chocolate before folding it in.
- Chill the mousse until fully set.
- Pipe for a cleaner presentation.
- Add berries or chocolate curls on top.
Common Mistakes
- Adding hot chocolate to the whipped cream.
- Overwhipping the cream.
- Not chilling long enough.
- Using toppings that make the mousse watery.
Call to Action
Try Chocolate Mousse Cups when you want a simple dessert that feels rich, refined, and special. They’re the kind of treat people remember.
Chocolate Mousse Cups
If you’re looking for a dessert that embodies elegance and indulgence, look no further than Chocolate Mousse Cups. This delightful treat is a staple in the world of desserts, offering a rich and silky experience that melts in your mouth. Originating from France, chocolate mousse has captivated dessert lovers for centuries, celebrated not only for its luxurious flavor but also for its versatility.
Ingredients
- 8 oz (225 g) dark chocolate (at least 70% cocoa), finely chopped
- 2 cups (480 ml) heavy whipping cream, chilled
- 1/4 cup (50 g) granulated sugar
- 1 teaspoon vanilla extract
- Pinch of salt
- Whipped cream for garnish (optional)
- Chocolate shavings or curls (optional)
- Fresh fruit (such as raspberries or strawberries) (optional)
- Mint leaves for decoration (optional)
Directions
In a heatproof bowl, melt the chopped dark chocolate over a pot of simmering water (double boiler method). Stir occasionally until smooth and glossy. Remove from heat and let it cool slightly, about 5-10 minutes.
In a separate large bowl, pour in the chilled heavy whipping cream. Using an electric mixer, beat on medium speed until soft peaks form. Gradually add granulated sugar, vanilla extract, and a pinch of salt while continuing to beat until stiff peaks form.
Once the melted chocolate has cooled, gently fold it into the whipped cream. Use a spatula to incorporate until no streaks remain.
Spoon the mousse into individual dessert cups or bowls. Cover with plastic wrap and refrigerate for at least 2 hours.
Once set, top each mousse cup with a dollop of whipped cream, chocolate shavings, and fresh fruit as desired. Serve chilled.
Nutrition Facts
Recipe Reviews
- ★★★★★
Excellent recipe!
Leave a Reply
Your email address will not be published. Required fields are marked *


Excellent recipe!